...and then watch me cheat!
So, there are many fine blogs that teach you how not to spend $100 on a sensory blanket for your child. They convinced me that I could probably handle this, too. My budget won't stretch to cover one $40 blanket, much less the 2 I feel I need.
1. I went out and bought poly-pellets (tiny weighted little spheres of plastic), because then the blankets can be washed and dried. There is nothing more important than the ability to wash an item a child will (hopefully) use over and over again!
2. I assembled my dream team of supplies: two old pillowcases, polypellets, ounce scale. Not pictured: ancient sewing machine, thread, tape, measuring tape, poker chips, pins
3. I checked to make sure my fabric had been washed. If it hadn't been washed, I would have done so at this point. As both pillows were old and had been washed several times, I just ironed the heck out of them.

4. I sat down to do maths. The pillowcases I was working with were both around 19" X 29"- so I rounded down to an even number to make division easier and figured I'd leave some extra room on the edges. 18" x 28" divides nicely into 42 3"x4" squares, so I went with that. Figuring out the weight of the blanket also involved maths. In general, the weight of the blanket should be 1/10 the child's weight, plus 1 pound. I researched the mean weight of children age 4 and, in general, the number was 40 lbs. So I needed a blanket 5 lbs heavy. 16 ounces in a pound, and I now knew that I needed 80 ounces of pellets in the blanket. 80 ounces divided between 42 squares meant roughly 2 ounces per square. If you chose to go crazy over exact measurements, that's your bag. Me, I want a blanket a kiddo can use and I don't want a headache over it. MATHS COMPLETE.

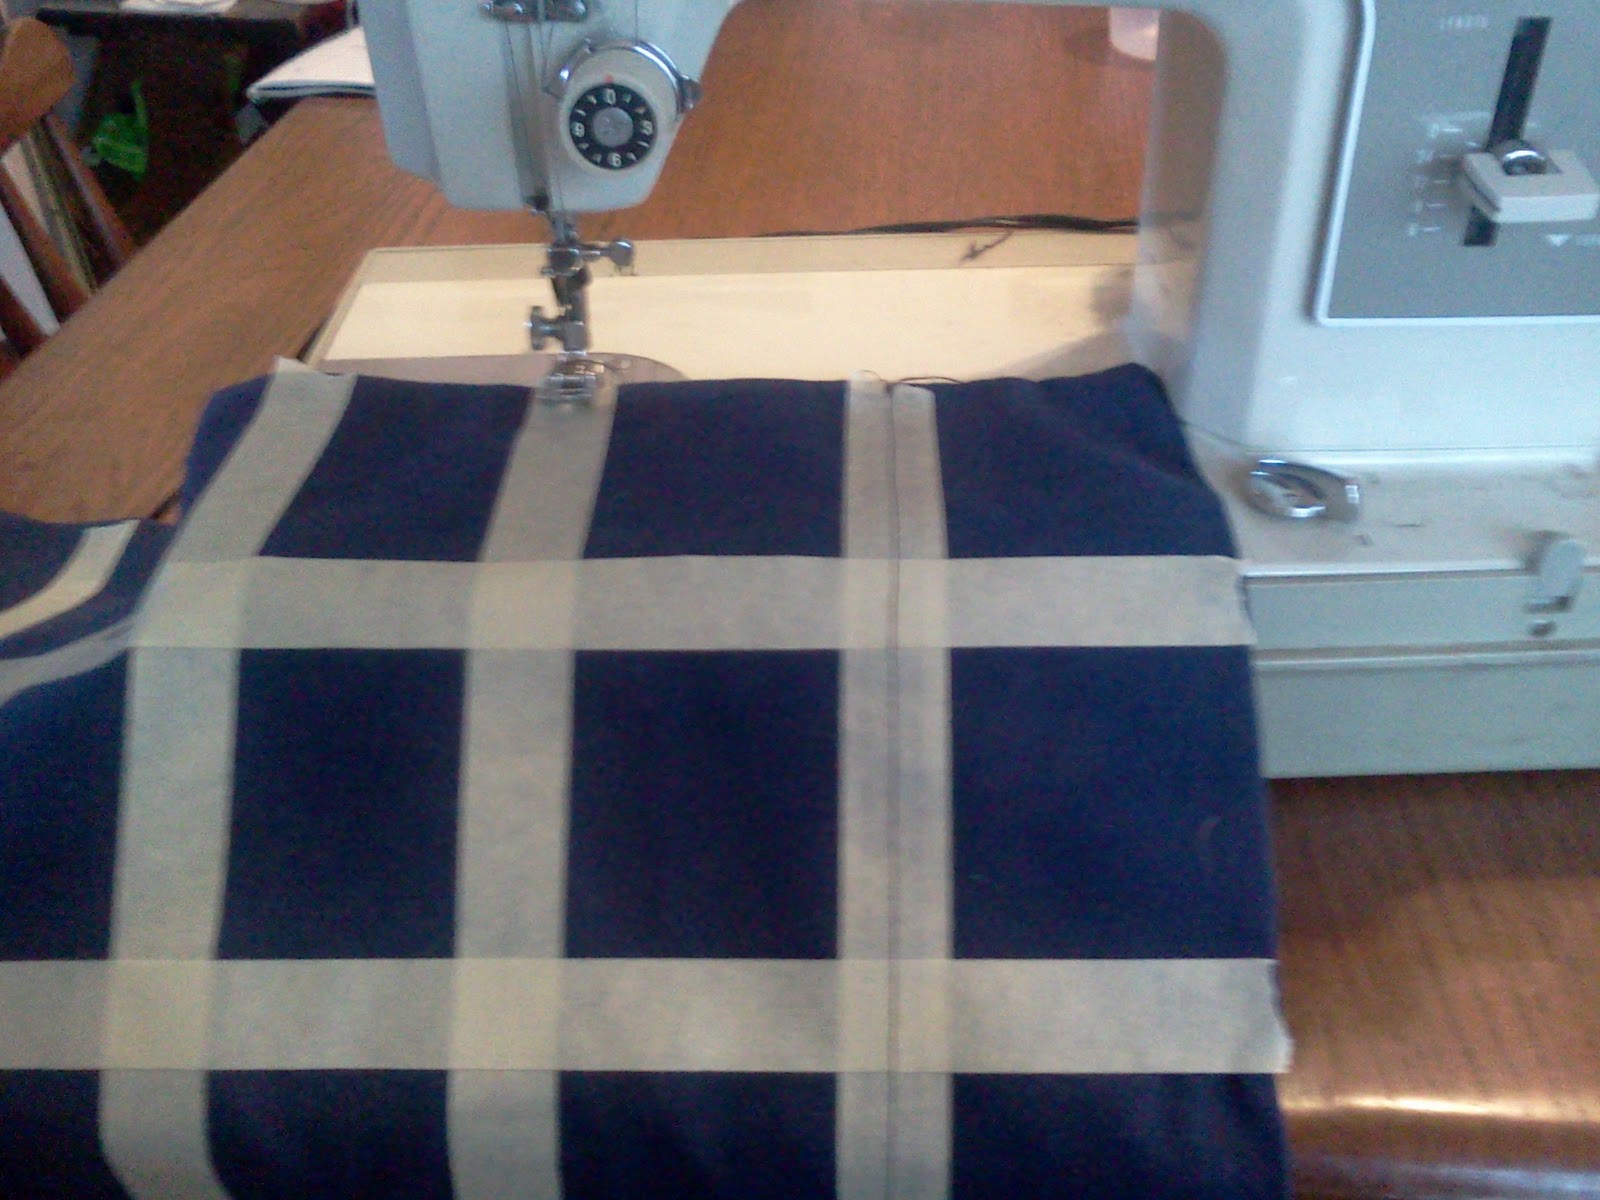
5. Because I am EXTREMELY LAZY, I decided to measure and tape the lines I would need to sew. I probably could have dug up chalk, which would easily wash away, but in the end, I was glad I chose tape, because I used the tape edge as a stiffener in the stuff-and-sew stage.
6. Now I get to start sewing! Because the pillowcases have finished seams, I didn't have to worry about reinforcing the outer edges- the whole point of using pillowcases rather than picking out cute fabric and sewing from scratch. If you're going from scratch, you'll want to reinforce the seams on the outer edge- either serge them, or french finish them, or simply sew them a couple times. I began by sewing the length-wise lines to make long channels into which I could pour the pellets.
7. I measured my first cup of pellets- 2 oz. of pellets was 100 on the little scale's cup. Awesome. Good to know- I didn't need to weigh each cup!
7. I poured the pellets into the first corner channel, and immediately discovered how hard it was to sew something so puffy with the pellets trying to escape. None of the blogs I'd read suggested pinning the pocket closed prior to sewing, and I was determined not to make anything harder on myself than I had to, so I tried to tough this out. It was very helpful to have the tape on the fabric- the stiffness helped me to push the pellets to the inside of the pocket. Eventually, I had a single pocket sewn into the blanket. YAY!

8. I did 6 more in this fashion before stating, "Okay, that's enough nonsense" and I went to go get my pins. I began pouring the pellets into each channel, pinning the pocket shut so there was minimal escapage. Again, the tape helped because I could pin on the edge of the tape and my pressure foot would have plenty of room to do the job. Using this method, I could sew the entire row at one time, which may or may not have saved me any time, but certainly saved me some frustration. A few pellets escaped from one or two channels each time, and I didn't sweat it, because, see above, I'm just trying to make a blanket for a kiddo to use, not a precise work of art.
9. Yay! Blanket done! I closed the top seam by rolling it over- after I rolled it over I realized that, because pillowcases come already hemmed, I could have just sewn the opening shut and reinforced it a few times. Total time: about 4 hours, from entering my house to finished. So pretty!

10. The next blanket, I said, "That took too long." I finished it in less than an hour by utilizing NEW MATHS. I divided the same pillowcase area by only 12 squares. Each square then needed 6 2/3 ounces of pellets, or roughly a full scale cup. I also added 4 poker chips to each pocket, because I have a kiddo that likes to squish his blanket and I thought he'd like to be able to feel something in there that was different- like a fidget toy hidden within the blanket. Once again, I taped the channels and the rows, sewed the channels, added the pellets and poker chips, sewed the row, and repeated until I was done. At the end, I just sewed the opening shut with two lines of stitching and some fancy zigzag stitching in between. No idea how holdfast that will actually be, but two lines of stitching are bound to hold better than one.


11. Then I washed the blankets. BECAUSE I COULD. And also because that would help me pull up the tape. But mostly just because it pleased me to be able to wash them.
Reflections: Next time, I think I'll make a blanket that's 24 squares big- 6 long channels and 4 rows. The second blanket lays flat nicely, but it gets very floppy on a three-dimensional object, like a lap. I can see spending 2 hours on making another blanket that combines the structure of the first with the shorter production time of the second. Weighted blankets no longer scare me. And I'm joining the ranks of those who don't want to pay $100.
Total cost: I owned the thread, poker chips, and pillow cases, so those were no cost. I imagine you can buy thread and pillow cases at St. Vincent de Paul or Goodwill for under $10 and you don't actually need the poker chips. The poly pellets cost me $6.99 a bag at JoAnne's. I get a teacher discount, which rocks, but still... $35 for 2 5-lb blankets.
Caveat: If you have a child who is bigger than 40 lbs, you will probably want to follow the 12 square instructions, because the fewer the squares, the more room for pellets. You'll need 96 oz of pellets for a 6 lb blanket for a 50 lb child, and 112 oz of pellets for a 7 lb blanket for a 60 lb child. Anything bigger than that, and I'm not even sure you should use a pillowcase anymore, but as I haven't done it myself, I can't be sure. There are probably advanced math equations designed to come up with the solution to this quandary, but everything on the notebook page above is the limit of my math ability. If you come up with the equation, awesome, post it below and I'll edit my post to reflect it.
Extra credit: Tomorrow or the next day, I'm making slipcovers for these. Yes, they're both washable and that's awesome, but it would also be awesome to just be able to take off a case and wash it while still having the blanket available for use. If I get super crazy awesome excited, I'll sew on zippers!